Electronic Health Record
Overview: The electronic health record ( EHR ) allows for complete documentation of every aspect of the patient’s care. This includes not only patient encounters but injections, patient voice, text and email communications, diagnostic results, electronic prescribing, and health goals. The EHR program also interfaces with the billing module, the appointment system, and offers a myriad of diagnostic aids including Medline and the Single Payer Screening Tool SPNIH. The EHR starts by selecting a Patient from a variety of efficient methods including the Encounter List ( Patients whom are signed in the waiting room ), the queuing system for kiosk check-in, phone messages, refills requests, abnormal values, reviewable records, or any actionable item ( “TODO” ) organized by priority. Each “TODO” item is assigned to a category, user or a Care Team that covers a broad category. Example: All Nurses (“NURSE”) or All Refills. (“RX”)
Selecting a Patient by Name or other item in the Demographic Record
From the initial EHR sign-on Screen (shown below ) type the patient’s medical record number or type 3 or more letters of the patient surname.
Search by medical record number or name is the default method. No special steps are needed to search by name or number. Simply type the name or number.
Try our online demo below: login physician password: physician
https://demo.openemr.io/openemr/interface/login/login.php?site=default
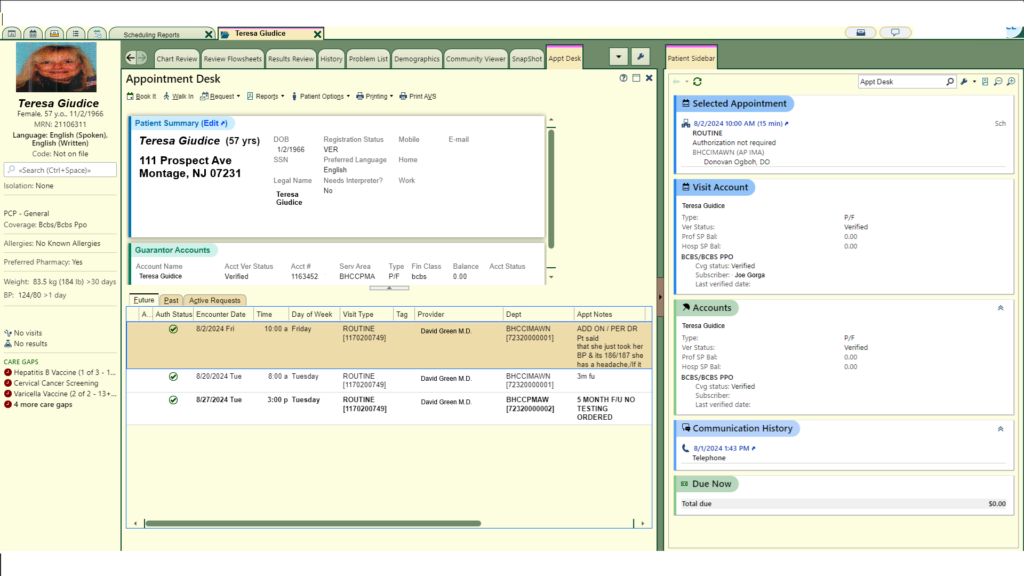
Selecting a Patient from the Patient Tracker
A patient can be checked in at the front desk, self serve kiosk or via a bar code scanner. The checked in Patient will then appear in the encounter list for the day as “Checked In”. Click on the patient in the tracker screen and the Patient Dashboard screen will appear.
.
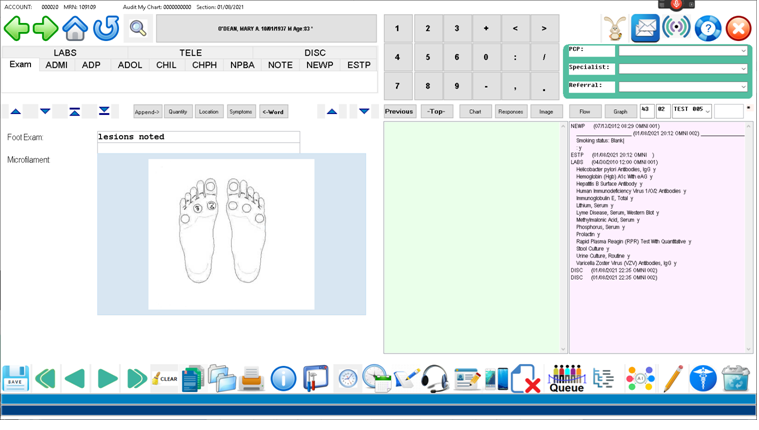
Starting the Patient Visit Documentation ( Charting )
Electronic Health Record– Chart / Diagnoses Setup
Overview: The Exam Setup function allows for easy selection and ordering of diagnoses from the Patient Problem List. ”
Complex Patient Example:
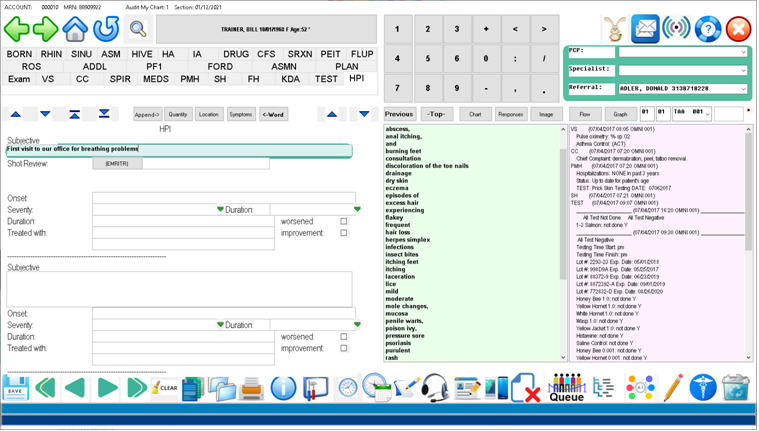
- To commence charting: Click on the section buttons and fill in the necessary fields, Click the “BACK” icon or press escape to move back to the previous screen.
- Example: HPI
- Steps: 1. Click on HPI
- 2. Enter appropriate fields by clicking on the responses in the right pane.
- 3. Press the ESCAPE key or click on the “BACK icon to proceed with charting or select another function.
When charting is completed: Press ESCAPE or click the “BACK” icon from the MAIN NAVIGATION PAGE.
To close the exam and return to the dashboard. Press ESCAPE or “BACK” again to select another patient